Starting with version 0.30.0, Sequential Workflow Designer makes it easy to build flow builders that support multiple triggers to start a flow. This enables rapid development of visual programming applications, empowering users - without any coding skills - to define clear, deterministic logic, often enhanced by AI.
How to start? At the start you need to install the Sequential Workflow Designer using NPM:
npm install sequential-workflow-designer
Now you need to import the designer to your code:
import { Designer, Uid } from 'sequential-workflow-designer';

// css
import 'sequential-workflow-designer/css/designer.css';
import 'sequential-workflow-designer/css/designer-light.css';
Before we continue, we need to define the task types that our flow builder will support. In this article, I’ll introduce three example task types: “Save file”, “Send email”, and “Loop”. However, you’re free to define as many task types as your use case requires. For example, each integration with an external system could be represented as a separate task type.
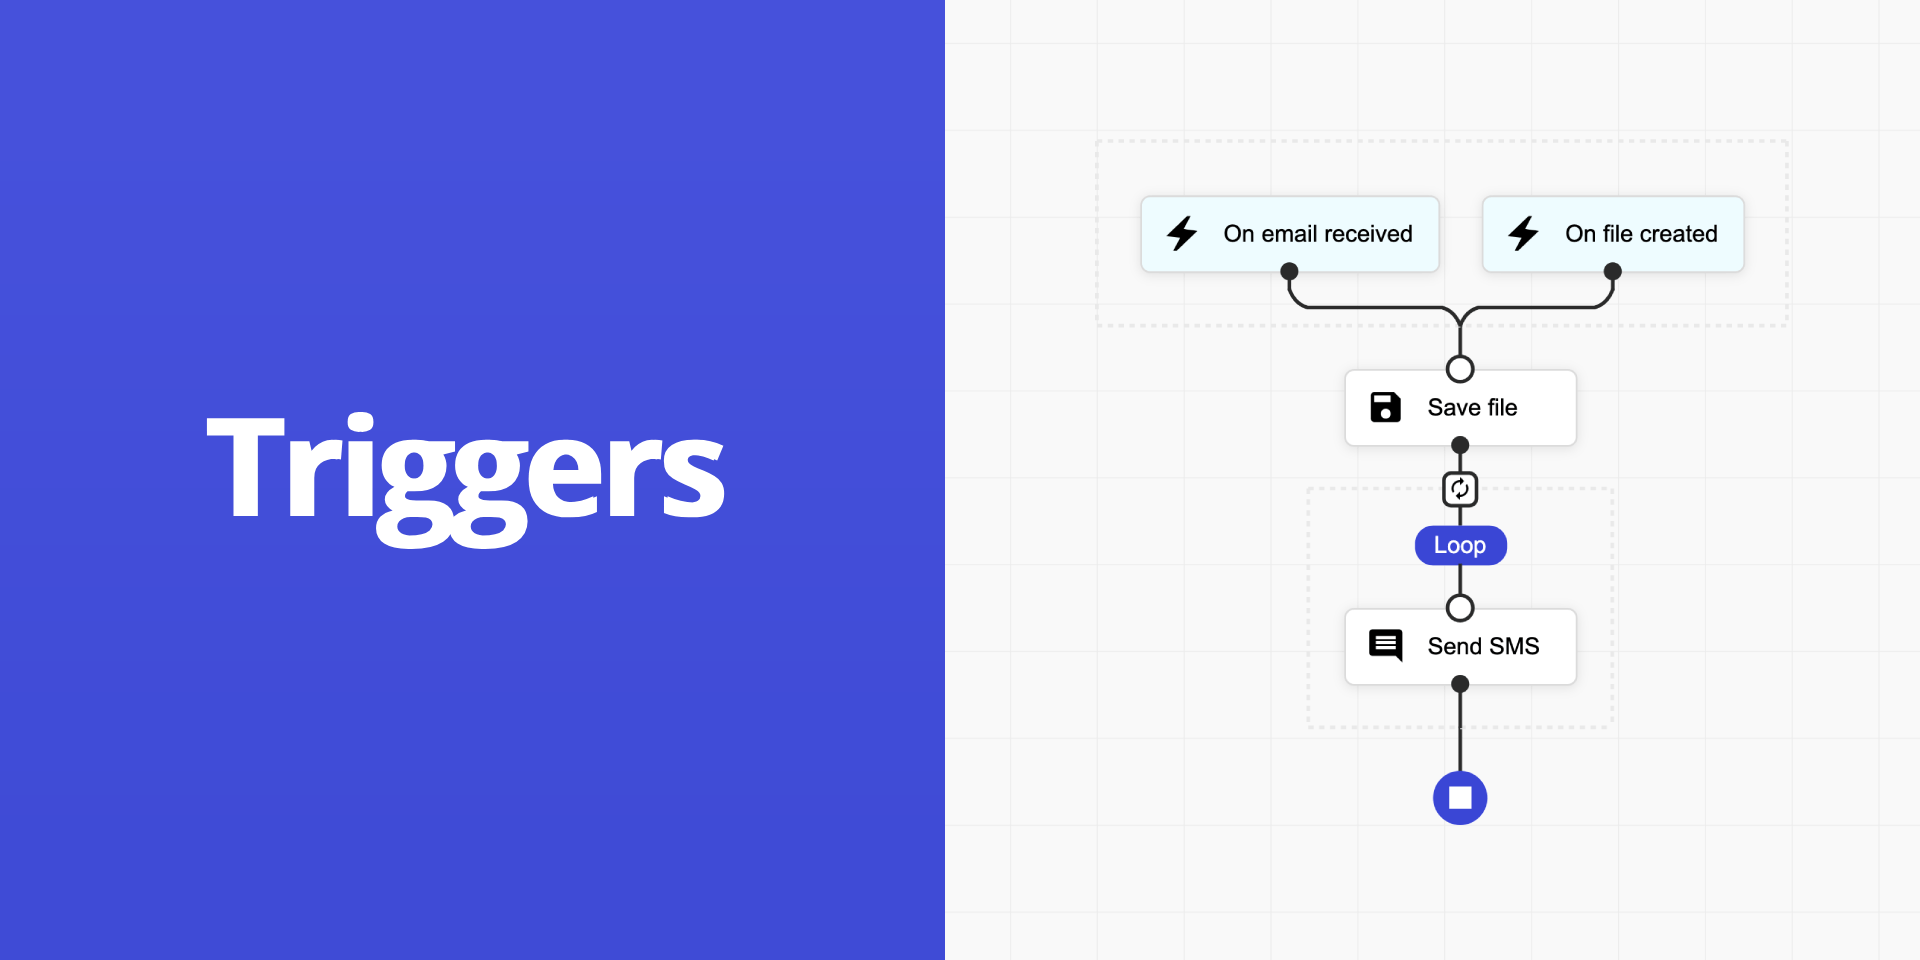
Next, we want the flow builder to let users define when a flow should start. We refer to these starting points as triggers. Triggers are special blocks that users can drag and drop into the start section of the flow, then configure accordingly. In this article, we’ll define three example triggers that will be available in the designer: “On email received”, “On file created”, and “On file modified”.
The goal is to create a flow builder that enables users to build flows starting from an event and then define a predictable sequence of logic. This logic will eventually be executed by a state machine, although we won’t focus on that part in this article.
Now, I’ll create two functions: one to generate a task and one to generate a trigger.
function createSaveFileStep() {
  return {
    id: Uid.next(),
    componentType: 'task',
    type: 'save-file',
    name: 'Save file',
    properties: {}
  };
}

function createOnEmailReceivedStep() {
  return {
    id: Uid.next(),
    componentType: 'task',
    type: 'trigger-on-email-received',
    name: 'On email received',
    properties: {}
  };
}
These functions are needed to complete the toolbox configuration. Now we're ready to initialize the designer for the first time.
const emptyDefinition = {
  sequence: [],
  properties: {}
};

const configuration = {
  steps: {},
  toolbox: {
    groups: [
      {
        name: 'Triggers',
        steps: [ createOnEmailReceivedStep() ]
      },
      {
        name: 'Tasks',
        steps: [ createSaveFileStep() ]
      }
    ]
  },
  controlBar: true,
  editors: false,
  placeholder: {},
  validator: {},
  extensions: []
};

const designer = Designer.create(
  document.getElementById('placeholder'),
  emptyDefinition,
  configuration
);
At this point, you should see the designer with an empty flow - no tasks added yet. Now, I’ll focus on creating a special section at the beginning of the flow where users can drag and drop only trigger blocks. It's important that this section accepts only triggers, not tasks. Likewise, triggers should not be allowed outside of this section. We can enforce these restrictions through the designer configuration.
Before we start, we need to add a special sequential step at the beginning of the flow definition. This step will act as a container for triggers. I’ll use the launchPad step component type to render it. This launch pad step component displays all nested steps aligned vertically and visually connected to the end of the container, creating the impression that any of the steps can trigger the flow.
While this component type can also be used for other use cases, such as parallel sections, it was primarily designed to handle triggers.
const emptyDefinition = {
  sequence: [
    {
      id: 'launchPad',
      name: 'Launch Pad',
      componentType: 'launchPad',
      type: 'launchPad',
      properties: {},
      sequence: []
    }
  ],
  properties: {}
};
Now, when you refresh the page, you should see a flow with a small container inside. At this point, you can drag and drop any step from the toolbox into this section — but that's not what we want. We only want to allow triggers in this section. To achieve this, we need to implement a custom placeholder controller and pass it to the designer by extending the configuration.
placeholder: {
  canCreate(sequence, index) {
    const definition = designer.getDefinition();
    const isRoot = sequence === definition.sequence;
    if (isRoot) {
      return index !== 0;
    }
    return true;
  },
  canShow(sequence, _, __, draggingStepType) {
    const definition = designer.getDefinition();
    const isTriggerStep = draggingStepType.startsWith('trigger-');
    const isLaunchPadSequence = sequence === definition.sequence[0].sequence;
    return (isLaunchPadSequence && isTriggerStep) || (!isLaunchPadSequence && !isTriggerStep);
  }
},
In the code above, I disabled the placeholder that appears before the launch pad step component, as I don’t want users to insert any steps before it. Then, in the canShow callback, I implemented a simple logic that hides placeholders if the dragged step type isn’t allowed in the target sequence.
After refreshing the page, you'll notice one issue: while drag-and-drop works as expected and the restrictions are in place, it's still possible to delete or move the launch pad step - which is not the intended behavior. To prevent this, I need to implement custom callbacks that restrict these actions.
steps: {
  isDuplicable(step) {
    return step.componentType !== 'launchPad';
  },
  isDeletable(step) {
    return step.componentType !== 'launchPad';
  },
  isDraggable(step) {
    return step.componentType !== 'launchPad';
  },
  isSelectable(step) {
    return step.componentType !== 'launchPad';
  }
},
Finally, everything is working as expected. We have created a flow designer that allows placing one or more triggers at the start of the flow, with various tasks arranged below.
To read the definition prepared by a user you need to call the getDefinition method on the designer instance. This will return a JSON object that represents the flow definition, including all steps and their properties.
const definition = designer.getDefinition();
Of course, this is just the beginning. Next, we need to implement editors for configuring all supported steps. Another important part is how to execute the designed flow, but that won’t be covered in this article. For more examples and detailed documentation, I recommend visiting the nocode-js.com website.
Check out the final online example 👉 here. You can also find the source code for this example and more on GitHub.
Links: